After working from home all day with hair & make-up done, and wearing a lovely sweater, I've still got PJ pants on the bottom and I wasn't about to leave the house. (The perks of working from home and having video only on the top half!) So ... to the fridge and pantry for dinner I went.
I had all these ingredients in my house. I can't stress how important it is to have a solid pantry and freezer full of ingredients you can use at a moment's notice. Everyone enjoyed this recipe, so here I am recording it for future use. It was SO easy and came together super fast. Clean up was easy, too (or so I hear from my 16 year old!).
----------------------------------
ONE POT MEDITERRANEAN SAUSAGE, RICE, AND BEANS (Gluten free)
Ingredients:
4 T olive oil, plus more for drizzling when serving
2 packages spinach and feta chicken sausage (total of 8 links)
3 cloves garlic, minced
1/4 - 1/2 tsp dried pepper flakes (or to your taste)
1 package frozen organic chopped spinach
1 15-oz can organic cannellini beans, drained and rinsed
1 15-oz can organic petite diced tomatoes (my can had no salt added)
1 1/2 cups jasmine rice
2 1/2 cups chicken broth (homemade, please)
1 tsp dried oregano
salt and pepper to taste
Method:
1. Heat olive oil in large dutch oven over medium-high heat. Slice sausages into bite-sized discs and add to pot. Add garlic and pepper flakes and stir for about 10-20 seconds or until the garlic becomes fragrant. Toss in frozen spinach and stir well, crunching apart the bigger frozen chunks.
2. Meanwhile, open the beans and rinse. Pour into pot. Open tomatoes and pour into the pot. Add rice. Stir well. Add chicken broth, oregano, and about 1 tsp of salt and freshly ground pepper. Mix well.
3. Bring mixture to a boil. Cover and reduce heat to low. Cook until rice is completely tender, about 20-25 minutes. Stir well from the bottom of the pot. Adjust seasoning. Portion into serving bowls and drizzle about 1/2 teaspoon olive oil on top to serve. Top with grated Parmesan cheese, if desired.
Monday, February 25, 2019
Monday, September 11, 2017
Chicken Zucchini Basil Soup
I know it sounds weird, but stick with me - this soup is DELICIOUS!
In my garden I have zucchini. So. Much. Zucchini. My family is getting tired of eating it in its various easily-recognizable forms: as part of a veggie omelette, sauteed, various baked versions - the standards.
Also in my garden, I have more basil than I can use for making pesto, caprese salad, and in anything else made with tomatoes. I need to use it up before it goes to seed.
Suddenly today, with the remains of what was Hurricane Irma rolling into town, the weather turned chilly and rainy, while at the same time I also needed to make another batch of my chicken broth. Perfect timing all around for a soup.
These days, I'm eating ultra low-carb, a modified ketogenic diet, which also has high fat. This recipe qualifies. Don't ask for macros or counts; I don't keep that close track, yet still managed to drop 25 pounds and keep it off. (I still have that last stubborn 10 lbs to go, but I'll take the win!)
I also have to feed my family, including my hungry-man personal trainer hubby. He insists on A LOT of protein with our dinner meals, meaning meat.
I came across a half dozen or more recipes online for zucchini basil soup, but they are generally vegan, vegetarian, and/or low-fat, none of which would work for how my family currently is eating.
This is my take on the recipes I found. Keep in mind, making this low-fat and/or vegan would be easy - simply substitute vegetable broth and don't use chicken, or whipping cream and garnish with only chopped basil but no sour cream.
But we loved it just like this, which is why I'm writing about it here - so I don't forget and can make it again later!
Another reason I made this recipe: I had most of a rotisserie chicken in the fridge. As I said, I knew I needed to make another batch of broth, and my daughter wanted some, plus the grocery store had them on an amazing sale, so of course I picked one up. Any chance you get to pick up a grocery-store made rotisserie chicken, grab one because they are so easy to use in recipes. And after you pick the meat off the carcass, you can use that for your chicken broth. So good!
Finally, I tried something else new. I'd sung the praises of my Vitamix to my mother-in-law for about a year or so when she decided to take the plunge and get one, too. She also loves it and she uses her Vitamix to shred chicken for various recipes. I figured making soup would be as good a time as any to give shredding chicken in the Vitamix a try and I was rewarded with a result perfect for this soup!
Here it is! Give it a try and let me know if you enjoy it!
----------------------------------------
CHICKEN ZUCCHINI BASIL SOUP (Low Carb, Gluten Free)
Ingredients:
3 Tablespoons olive oil
2 Vidalia or other sweet yellow onions, chopped
8 cloves garlic, peeled and chopped
2-3 pounds fresh zucchini, large diced
8 cups homemade chicken broth
1 tsp pink Himalayan salt
fresh ground pepper
1 cup tightly packed fresh basil leaves
1/2 - 3/4 cooked rotisserie chicken, shredded in Vitamix (or chopped finely) (2 breasts, 1 thigh, 1 leg, etc.)
1/2 whipping cream
sour cream and extra basil for garnish
Method:
1. Heat olive oil in large dutch oven over medium-high heat. Add onions and cook for 2-3 minutes until translucent. Add garlic and lower temperature to medium; saute for 2-3 minutes more.
2. Stir in zucchini and broth and season with salt and pepper to taste. Bring to boil and lower temperature. Cover and simmer for 15 minutes, stirring occasionally.
3. After 15 minutes, the zucchini should be translucent and easily smashed with a fork. Remove from heat and add basil. Use an immersion blender or add to blender to puree. If using a regular blender, puree in batches, and start slowly, using a towel to cover the lid to avoid exploding hot soup everywhere. (If you don't have an immersion blender, get this one. You'll wonder how you ever lived without it!). The basil will be visible as small flecks ... that's ok. It's perfect!
4. Stir in chicken and cream and return to medium heat. Stir and simmer about 5-7 minutes. Season again with salt and pepper to taste. Serve with a dollop of sour cream and a chiffonade of basil on top. If your diet allows, you can also add a nice crusty bread to dunk in the soup. My kids loved it!
In my garden I have zucchini. So. Much. Zucchini. My family is getting tired of eating it in its various easily-recognizable forms: as part of a veggie omelette, sauteed, various baked versions - the standards.
Also in my garden, I have more basil than I can use for making pesto, caprese salad, and in anything else made with tomatoes. I need to use it up before it goes to seed.
Suddenly today, with the remains of what was Hurricane Irma rolling into town, the weather turned chilly and rainy, while at the same time I also needed to make another batch of my chicken broth. Perfect timing all around for a soup.
These days, I'm eating ultra low-carb, a modified ketogenic diet, which also has high fat. This recipe qualifies. Don't ask for macros or counts; I don't keep that close track, yet still managed to drop 25 pounds and keep it off. (I still have that last stubborn 10 lbs to go, but I'll take the win!)
I also have to feed my family, including my hungry-man personal trainer hubby. He insists on A LOT of protein with our dinner meals, meaning meat.
I came across a half dozen or more recipes online for zucchini basil soup, but they are generally vegan, vegetarian, and/or low-fat, none of which would work for how my family currently is eating.
This is my take on the recipes I found. Keep in mind, making this low-fat and/or vegan would be easy - simply substitute vegetable broth and don't use chicken, or whipping cream and garnish with only chopped basil but no sour cream.
But we loved it just like this, which is why I'm writing about it here - so I don't forget and can make it again later!
Another reason I made this recipe: I had most of a rotisserie chicken in the fridge. As I said, I knew I needed to make another batch of broth, and my daughter wanted some, plus the grocery store had them on an amazing sale, so of course I picked one up. Any chance you get to pick up a grocery-store made rotisserie chicken, grab one because they are so easy to use in recipes. And after you pick the meat off the carcass, you can use that for your chicken broth. So good!
Finally, I tried something else new. I'd sung the praises of my Vitamix to my mother-in-law for about a year or so when she decided to take the plunge and get one, too. She also loves it and she uses her Vitamix to shred chicken for various recipes. I figured making soup would be as good a time as any to give shredding chicken in the Vitamix a try and I was rewarded with a result perfect for this soup!
Here it is! Give it a try and let me know if you enjoy it!
----------------------------------------
CHICKEN ZUCCHINI BASIL SOUP (Low Carb, Gluten Free)
Ingredients:
3 Tablespoons olive oil
2 Vidalia or other sweet yellow onions, chopped
8 cloves garlic, peeled and chopped
2-3 pounds fresh zucchini, large diced
8 cups homemade chicken broth
1 tsp pink Himalayan salt
fresh ground pepper
1 cup tightly packed fresh basil leaves
1/2 - 3/4 cooked rotisserie chicken, shredded in Vitamix (or chopped finely) (2 breasts, 1 thigh, 1 leg, etc.)
1/2 whipping cream
sour cream and extra basil for garnish
Method:
1. Heat olive oil in large dutch oven over medium-high heat. Add onions and cook for 2-3 minutes until translucent. Add garlic and lower temperature to medium; saute for 2-3 minutes more.
2. Stir in zucchini and broth and season with salt and pepper to taste. Bring to boil and lower temperature. Cover and simmer for 15 minutes, stirring occasionally.
3. After 15 minutes, the zucchini should be translucent and easily smashed with a fork. Remove from heat and add basil. Use an immersion blender or add to blender to puree. If using a regular blender, puree in batches, and start slowly, using a towel to cover the lid to avoid exploding hot soup everywhere. (If you don't have an immersion blender, get this one. You'll wonder how you ever lived without it!). The basil will be visible as small flecks ... that's ok. It's perfect!
4. Stir in chicken and cream and return to medium heat. Stir and simmer about 5-7 minutes. Season again with salt and pepper to taste. Serve with a dollop of sour cream and a chiffonade of basil on top. If your diet allows, you can also add a nice crusty bread to dunk in the soup. My kids loved it!
Tuesday, March 15, 2016
No-Bake Banana Cream Pie with Chocolate Crust Recipe [Vegan, Gluten Free, Sugar Free]
Now here's a dessert you can feel good about eating and serving to people you love!
If you like chocolate dipped frozen bananas, you'll need to bookmark this page because it's that flavor, but easier to eat and far more nutritious with the added ingredients, no sugar, no dairy, and all raw ingredients. Plus - it's perfect when you want to whip up a yummy dessert without turning on the oven. Somehow when something I prepare doesn't go into the oven, it feels like less of a production and so much easier. That could just be me!
Yesterday was PI Day - you know 3.14 - and to celebrate the occasion, or any occasion really, I made food to go with the theme, which means yesterday was all about the pies! Chicken pot pie was for dinner (delicious, but not quite where I want it to be for my blog) and for dessert this decadent, creamy, dreamy banana cream pie.
I seek to make my food be plant-based and as nutritious as possible. After hunting online for inspiration, I came up with the following lusciousness everyone in the family enjoyed. I hope you enjoy it, too! We will be adding it to our regular rotation of healthy desserts. Will you? Let me know in the comments below!
---------------------------------------
No-Bake Banana Cream Pie with Chocolate Crust
Chocolate Crust Ingredients:
2 Tablespoons raw cacao powder
1/2 cup raw pecans (or walnuts would also be delicious)
1/2 cup unsweetened raw coconut
1/2 cup organic raisins (I've also done this with dates, but I always have raisins and it came out perfectly!)
1 Tablespoon coconut oil
METHOD:
Put all ingredients into food processor or high speed blender and blend until well combined and nuts are ground. I like the nuts a little bigger and chunkier for more texture, but you can grind yours as much or as little as you like.
Press into a glass pie plate using a spoon or your fingers. Freeze while you prepare the filling.
Filling Ingredients:
1 1/4 cup raw cashews, soaked and drained (Most recipes tell you to soak these for a minimum of 4 hours or overnight, but with the Vitamix it's not necessary. Before doing anything else with the crust, I add the cashews to a Mason jar and cover with filtered water. I add all the other filling ingredients to the blender first and then drain the cashews just before adding to the blender. Works like a charm!)
3 heaping tablespoons coconut oil, melted (if it's a hot day, leave it out on the counter, it'll melt quickly!)
1/4 cup organic maple syrup (agave would also work)
1 medium *just ripe* banana (mostly yellow with a few tiny brown spots, equals about 1/2 cup mashed)
1/3 cup full fat coconut milk (from the can, not carton)
1/2 teaspoon organic pure vanilla extract
1/4 teaspoon Himalayan sea salt
2-3 Tablespoons fresh lemon juice (juice of 1 small organic lemon)
METHOD:
Put all filling ingredients into a high speed blender and blend on high for about 1-2 minutes until the filling is silky smooth and creamy. It should be thick, but not so think you need to use a tamper. If it is too think, add a tiny bit more coconut milk, coconut water, or filtered water to smooth it out and continue blending til very smooth.
Pour filling into prepared crust and freeze until serving, at least 2 hours, or more for a firmer pie.
Top with whipped coconut cream and enjoy!
Notes:
You may be tempted to leave out the lemon juice and salt, but both are needed. The tiny bit of salt enhances the flavors dramatically. The lemon juice is needed for the cashews. They neutralize the "cashew" flavor so you'll never know there are nuts in this filling. You don't want anything to compete with the tropical flavors from the banana and coconut. You will not be able to taste the lemon. I promise. :-)
If you like chocolate dipped frozen bananas, you'll need to bookmark this page because it's that flavor, but easier to eat and far more nutritious with the added ingredients, no sugar, no dairy, and all raw ingredients. Plus - it's perfect when you want to whip up a yummy dessert without turning on the oven. Somehow when something I prepare doesn't go into the oven, it feels like less of a production and so much easier. That could just be me!
Yesterday was PI Day - you know 3.14 - and to celebrate the occasion, or any occasion really, I made food to go with the theme, which means yesterday was all about the pies! Chicken pot pie was for dinner (delicious, but not quite where I want it to be for my blog) and for dessert this decadent, creamy, dreamy banana cream pie.
I seek to make my food be plant-based and as nutritious as possible. After hunting online for inspiration, I came up with the following lusciousness everyone in the family enjoyed. I hope you enjoy it, too! We will be adding it to our regular rotation of healthy desserts. Will you? Let me know in the comments below!
---------------------------------------
No-Bake Banana Cream Pie with Chocolate Crust
Chocolate Crust Ingredients:
2 Tablespoons raw cacao powder
1/2 cup raw pecans (or walnuts would also be delicious)
1/2 cup unsweetened raw coconut
1/2 cup organic raisins (I've also done this with dates, but I always have raisins and it came out perfectly!)
1 Tablespoon coconut oil
METHOD:
Put all ingredients into food processor or high speed blender and blend until well combined and nuts are ground. I like the nuts a little bigger and chunkier for more texture, but you can grind yours as much or as little as you like.
Press into a glass pie plate using a spoon or your fingers. Freeze while you prepare the filling.
Filling Ingredients:
1 1/4 cup raw cashews, soaked and drained (Most recipes tell you to soak these for a minimum of 4 hours or overnight, but with the Vitamix it's not necessary. Before doing anything else with the crust, I add the cashews to a Mason jar and cover with filtered water. I add all the other filling ingredients to the blender first and then drain the cashews just before adding to the blender. Works like a charm!)
3 heaping tablespoons coconut oil, melted (if it's a hot day, leave it out on the counter, it'll melt quickly!)
1/4 cup organic maple syrup (agave would also work)
1 medium *just ripe* banana (mostly yellow with a few tiny brown spots, equals about 1/2 cup mashed)
1/3 cup full fat coconut milk (from the can, not carton)
1/2 teaspoon organic pure vanilla extract
1/4 teaspoon Himalayan sea salt
2-3 Tablespoons fresh lemon juice (juice of 1 small organic lemon)
METHOD:
Put all filling ingredients into a high speed blender and blend on high for about 1-2 minutes until the filling is silky smooth and creamy. It should be thick, but not so think you need to use a tamper. If it is too think, add a tiny bit more coconut milk, coconut water, or filtered water to smooth it out and continue blending til very smooth.
Pour filling into prepared crust and freeze until serving, at least 2 hours, or more for a firmer pie.
Top with whipped coconut cream and enjoy!
Notes:
You may be tempted to leave out the lemon juice and salt, but both are needed. The tiny bit of salt enhances the flavors dramatically. The lemon juice is needed for the cashews. They neutralize the "cashew" flavor so you'll never know there are nuts in this filling. You don't want anything to compete with the tropical flavors from the banana and coconut. You will not be able to taste the lemon. I promise. :-)
Wednesday, February 10, 2016
Creamy Green Goddess Feel Better Soup [Gluten free, dairy-free, vegan]
Sick, sick, sick.
If I wasn't sick, the name of this soup might be different, but I've got a lingering case of bronchitis and wanted to make some soup from the leftover broccoli from the other night. I searched a bunch of recipes starting with vegan broccoli soup (because milk or cream or cheese when you're sick isn't smart and I limit dairy anyway) and came up with something that turned into deliciousness in my Vitamix. Give it a try, whether you're sick or feeling fabulous. I already feel a spring in my step less than an hour later!
Remember - use all organic ingredients when possible and rinse all produce before tossing it into your blender.
Creamy Green Goddess Feel Better Soup
Ingredients:
2 cups filtered water
1 cup broccoli (mine was steamed for about a minute and leftover from the night before, but raw would be fine)
1 stalk of celery (with leaves)
1/4 yellow squash or zucchini (I had yellow squash on hand)
1 kale leaf (I used Tuscan kale)
juice from 1/2 lemon
1 cup raw cashews
leaves from 3 springs of thyme
1 tablespoon brewer's yeast flakes
1 tsp sea salt
a few grinds freshly ground pepper
Method:
Add all ingredients into a high speed blender and blend on high for 5-6 minutes until hot. Check seasoning with salt and pepper, serve and enjoy!
If I wasn't sick, the name of this soup might be different, but I've got a lingering case of bronchitis and wanted to make some soup from the leftover broccoli from the other night. I searched a bunch of recipes starting with vegan broccoli soup (because milk or cream or cheese when you're sick isn't smart and I limit dairy anyway) and came up with something that turned into deliciousness in my Vitamix. Give it a try, whether you're sick or feeling fabulous. I already feel a spring in my step less than an hour later!
Remember - use all organic ingredients when possible and rinse all produce before tossing it into your blender.
Creamy Green Goddess Feel Better Soup
Ingredients:
2 cups filtered water
1 cup broccoli (mine was steamed for about a minute and leftover from the night before, but raw would be fine)
1 stalk of celery (with leaves)
1/4 yellow squash or zucchini (I had yellow squash on hand)
1 kale leaf (I used Tuscan kale)
juice from 1/2 lemon
1 cup raw cashews
leaves from 3 springs of thyme
1 tablespoon brewer's yeast flakes
1 tsp sea salt
a few grinds freshly ground pepper
Method:
Add all ingredients into a high speed blender and blend on high for 5-6 minutes until hot. Check seasoning with salt and pepper, serve and enjoy!
Monday, September 28, 2015
Sorta-Souffles - Italian Baked Eggs and Bacon
| I served mine with raisin toast! |
This is gluten-free and if you wanted to leave out the cheese, you could easily make it dairy-free.
Sorta-Souffle Minis - Italian Baked Eggs and Bacon
INGREDIENTS:
2 tablespoons extra virgin olive oil
3/4 cup diced onion
2 garlic cloves, minced
1/2 cup fresh baby spinach leaves
1/2 teaspoon sea salt. divided
4 ounces pancetta, cut into small pieces (Italian bacon) (Note - I have also used Canadian bacon; you could try regular cooked bacon or even prosciutto)
olive oil spray for oiling the ramekins
6 large eggs
3/4 cup plain almond milk
1 teaspoon dried Italian herb seasoning
freshly ground pepper to taste
1/2 cup provolone cheese, cut into small pieces
1/4 cup Parmesan cheese
METHOD:
Preheat the oven to 400F. In a medium saucepan, heat the olive oil over medium-high heat. Add the onion and saute until soft and translucent, about 4-6 minutes. Add the spinach, garlic, and 1/4 teaspoon salt and saute for an additional 1-2 minutes until the spinach is fully wilted and the garlic doesn't burn. Stir in the meat and let cool.
In a medium mixing bowl, whisk together eggs, almond milk, herbs, freshly ground pepper, and remaining salt. Fold in the cooked onion mixture and provolone cheese and stir to combine well, making sure the cheese doesn't clump together.
Spray 6 ramekins with olive oil spray and divide mixture evenly among ramekins using a ladle to measure. Evenly distribute Parmesan cheese to top all mini-souffles.
Place on cookie sheet and into preheated oven and bake for 20-25 minutes until the tops are golden and the souffles have puffed slightly. Enjoy warm from the oven.
Sunday, August 2, 2015
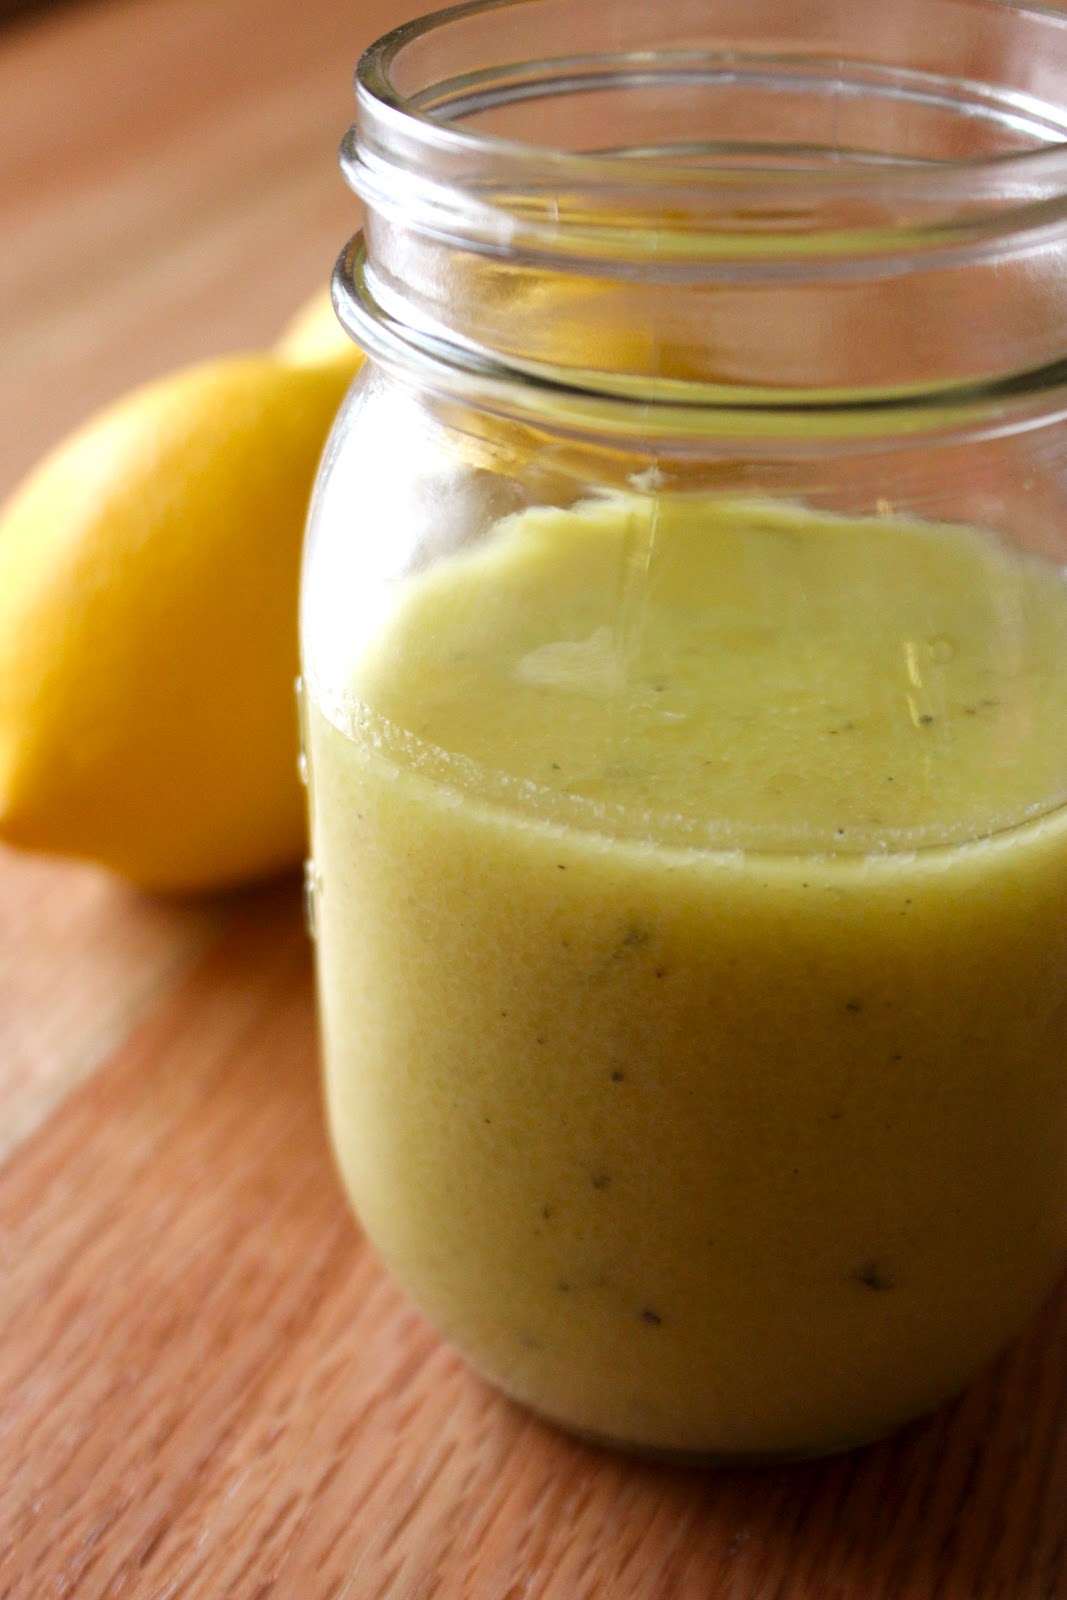
Garlic Lemon Vinaigrette Dressing
Where we used to live, my parents were about three miles from our house. My life resembled the TV sitcom, "Everybody Loves Raymond," where I was Raymond (I'm not kidding!). It was a fabulous life, but we decided our family was ready for a change. My husband had a career opportunity here in East Tennessee, and my in-laws live in the area, so we knew the timing was right for our move down south and so far we are enjoying it very much!
This dressing is one of my favorites because it is so easy to make and is so delicious - especially with a green that can hold up to the amount of garlic, like baby arugula - also known as rocket (I love that name!), or a mix of other hearty leaves like beet greens, dandelion greens, escarole or you can jump on the kale craze and enjoy this dressing on a baby kale salad.
Today I hosted my mother-in-law and father-in-law for a lovely Sunday brunch and served:
Egg Casserole
Arugula Salad with Lemon Vinaigrette
Fresh Watermelon
Double Chocolate Zucchini Mini Muffins
Mimosas
Everything was organic, home-prepared in my kitchen and came out very well. I'll post a separate entry for each item I served. Because my Mom-in-law asked specifically for the dressing recipe, I decided to start there!
Garlic Lemon Vinaigrette Dressing
(Dairy-free, gluten-free, sugar-free )
Ingredients:
¼ c olive oil
¼ c fresh-squeezed lemon juice
1 tsp lemon zest
¼ tsp of xylitol, stevia, monk fruit, or other natural
sweetener OR 1 Tablespoon organic, raw honey
2 garlic cloves, minced
2 tsp fresh oregano, minced (or ½ tsp dried)
Sea Salt to taste
Freshly ground Pepper to taste
Place all ingredients into a jar (Ball or Mason style), tightly close the lid and
shake it like you mean it for about 15-20 seconds. Serve over any firm, greens; my favorite is organic baby arugula.
Monday, May 25, 2015
Dairy Free Creamy Garlic Calamari with Wilted Fresh Spinach over Fettuccine
| Yes, that's a tiny bit of organic Parmesean on top. Leave it off for 100% dairy-free. |
When I was in my mid-20s I gave up dairy totally for about a year or so. At the time, it wasn't as easy as it is today because there were so few alternatives, and almost no one writing dairy-free recipes online. But when I gave up eating all forms of dairy, I noticed my seasonal allergies completely vanished, almost like magic. I felt better and didn't miss it - too much.
Milk was an easy thing. I did rice milk at the time and it didn't take much getting used to. It was similar in texture to skim milk. So that one was simple.
But then, there was cheese. Glorious creamy, melty, flavorful, cheese. The substitutes SUCKED. It wasn't even worth it to eat the fake, plasticy, artificial-tasting sort of lookalike. Cheese did me in.
There was the Parmesan cheese I missed putting on my pasta.
And the creaminess of a beautiful bowl of mac-n-cheese.
And a slice of swiss on a turkey sandwich.
And pizza. Oh yes. Pizzzzzzaaaaaahhhhh.
So I slowly went back to dairy.
Now that I'm cleaning up my diet and looking at foods that "bother" me, of course, dairy is tops on that list. So when I cook, I seek to eliminate as much dairy as possible. When I *do* use dairy, it's organic and I use it sparingly. Or I go all-in and know I'm going to be in pain later. But it's becoming less and less worth it for the pain.
My kiddos wanted calamari (they're foodies). I was feeling like a little creaminess. And this is what I came up with:
-------------------------------------------------
Dairy Free Creamy Garlic Calamari with Wilted Fresh Spinach over Fettuccine
Ingredients:
4 Tablespoons Olive oil, separated1 onion, chopped (I used organic vidalias)
7-8 cloves garlic, minced, separated
1 cup white wine
1 cup water
1/2 cup cashews
Juice of 1 lemon
4 Tablespoons Brewers yeast
3 tsp Salt, separated (or to taste)
1/2 tsp dried basil
1 bag fresh spinach
1 lb raw frozen calamari
1 package gluten free fettuccine noodles, cooked according to package instructions
1-2 tsp crushed red pepper flakes
Preparation:
Prepare noodles. While water comes to a boil and noodles begin cooking, prepare the sauce and calamari.
Add 2 Tablespoons olive oil to skillet. Saute onion on medium heat for several minutes until translucent. Add about half the garlic and raise heat to medium high until both are slightly browned.
While onion and garlic are cooking, to high speed blender (like Vitamix or Blendtec) add wine, water, cashews, lemon juice, 1 tsp salt and basil. When onion and garlic are ready, add to blender and blend on high about 3-4 minutes.
After pasta boils, drain in colander in sink. Put pot back on the stove over high heat, add remaining olive oil and heat for 20-30 seconds. Add calamari and garlic and sauté about 1 minute until calamari is cooked. DO NOT OVERCOOK unless you want to eat rubber band-like fish. Toss in spinach and season with 1 tsp salt and stir for about 20-30 seconds until just starting to barely wilt. Add sauce and warm through, about 30 seconds. Add pasta to pot and stir to coat.
Serve immediately garnished with red pepper flakes to your taste and with leftover chilled white wine in a lovely glass on the side.
Thursday, March 5, 2015
Fish Tacos
Fish tacos. Healthy, quick, delicious. This was so good tonight my girls begged for more. It was one of those times I tossed together a bunch of things and it came out as fabulous as if we bought it from a food truck. So I'm here because I have to write this down or else I'll forget what I made!
This recipe is gluten-free, and if you use non-dairy sour cream, is dairy-free, as well. Use non GMO corn tortillas and organic avocados and other fresh organize ingredients and you have an amazing healthy meal.
Prepare each component in the order listed so the slaw has a little while to come together as it sits.
For Cabbage Slaw
1 C finely sliced or shredded cabbage (green or red; I used green)
2 chopped green onions
3 Tablespoons fresh-squeezed lime juice
1/3 Cup sour cream (or non-dairy sour cream alternative would work well, too)
1/2 teaspoon cumin
sea salt and pepper to taste
Combine cabbage and onions in a bowl. Whisk together remaining ingredients. Reserve half of the sour cream mixture for drizzling over the finished tacos and stir remaining into the cabbage and onions. Mix well.
For the Fish
2 pounds tilapia (or other whitefish like Mahi Mahi, or snapper)
Seasoning mix:
1 teaspoons granulated garlic
1/2 tsp cumin
1 1/2 teaspoons sea salt
few grinds fresh ground pepper
2 Tablespoons olive oil
Mix together seasoning mix and generously season both sides of each piece of fish. Heat non stick pan (I use ceramic) over medium-high heat and add olive oil. Pan fry both sides of fish in batches as necessary until cooked completely through and flaky, about 5-6 minutes. Split each filet in two and cover to keep warm.
For Serving:
Package corn tortillas
Guacamole (homemade is best!)
Heat the tortillas over gas range by placing directly on burner with medium to low flame and using tongs to turn about every 10 seconds until the tortilla is soft and very slightly charred in a few places. Or, if you have electric, place several on a cookie sheet in a single layer under the broiler and watch VERY closely. Place on a plate and cover with dry cotton tea towel to keep warm and steam a bit.
Assemble the tacos in this order:
One tortilla
One half of a piece of fish
2-3 Tablespoons Slaw
1 Tablespoon Guacamole
Drizzle with about 1-2 teaspoons sour cream sauce per taco
Few drops Chulula or favorite hot pepper sauce
Make a lot of these because they will go fast!!
ENJOY!
This recipe is gluten-free, and if you use non-dairy sour cream, is dairy-free, as well. Use non GMO corn tortillas and organic avocados and other fresh organize ingredients and you have an amazing healthy meal.
Prepare each component in the order listed so the slaw has a little while to come together as it sits.
For Cabbage Slaw
1 C finely sliced or shredded cabbage (green or red; I used green)
2 chopped green onions
3 Tablespoons fresh-squeezed lime juice
1/3 Cup sour cream (or non-dairy sour cream alternative would work well, too)
1/2 teaspoon cumin
sea salt and pepper to taste
Combine cabbage and onions in a bowl. Whisk together remaining ingredients. Reserve half of the sour cream mixture for drizzling over the finished tacos and stir remaining into the cabbage and onions. Mix well.
For the Fish
2 pounds tilapia (or other whitefish like Mahi Mahi, or snapper)
Seasoning mix:
1 teaspoons granulated garlic
1/2 tsp cumin
1 1/2 teaspoons sea salt
few grinds fresh ground pepper
2 Tablespoons olive oil
Mix together seasoning mix and generously season both sides of each piece of fish. Heat non stick pan (I use ceramic) over medium-high heat and add olive oil. Pan fry both sides of fish in batches as necessary until cooked completely through and flaky, about 5-6 minutes. Split each filet in two and cover to keep warm.
For Serving:
Package corn tortillas
Guacamole (homemade is best!)
Heat the tortillas over gas range by placing directly on burner with medium to low flame and using tongs to turn about every 10 seconds until the tortilla is soft and very slightly charred in a few places. Or, if you have electric, place several on a cookie sheet in a single layer under the broiler and watch VERY closely. Place on a plate and cover with dry cotton tea towel to keep warm and steam a bit.
Assemble the tacos in this order:
One tortilla
One half of a piece of fish
2-3 Tablespoons Slaw
1 Tablespoon Guacamole
Drizzle with about 1-2 teaspoons sour cream sauce per taco
Few drops Chulula or favorite hot pepper sauce
Make a lot of these because they will go fast!!
ENJOY!
Tuesday, January 6, 2015
Healthy Green Smoothie Recipe (dairy-free, gluten free)
Happy New Year!
As I write this, my arms a bit on the sore side, and my hands are shaking just the tiniest bit. You see, I just completed my customized workout designed for me and my specific body and all its issues by the western hemisphere's best personal trainer. (I was afraid if I said "best personal trainer in the known universe" that might sound hypey.)
Yes, just like many people this time of year, I'm working on getting healthy. I had some excellent excuses for getting to be completely in the worst shape of my life that go far beyond working too much while sitting on my previously-growing-by-the-day butt (I definitely do that), or my Mommy-baby weight (my youngest just turned 10 years old, so I guess I have to be done with that excuse). Two years ago I was diagnosed with -- and completely cured of! - lung cancer. But to get better I had open lung surgery (if you're into fancy medical terms it was a thoracotomy), and they removed a big chunk of my right lung. Because they had to cut through several layers of skin and muscle to do that, well, to this day, even after physical therapy my back still isn't fully recovered.
So two years ago this very month, after coming through that surgery, I decided I would get extra healthy and started doing the green smoothie thing.
That turned out to be a big mistake and ended up giving me kidney stones a few months later (I described why in this post), which sent me back to the hospital for two more surgeries. Seriously. That was a heckuva crappy year!
Now, more educated about healthy foods, I'm fully focused on getting into the best, most-rockin', HOT shape of my life. That is a tall order, considering in my 20s I wore size 4 clothing and worked out up to 6 days a week. But that was before I was married to the best trainer ever, and before I knew about GMOs, understood why organic food is crucial, and a whole host of other things.
So, here's today's post work-out smoothie recipe.
------------------------------------
Healthy Green Smoothie - Kale, Pineapple, Grape - Dairy-Free, Gluten-Free
3-4 Tablespoons filtered water
1 cup rough chopped pineapple
1 cup packed curly kale
1 cup frozen red grapes (no stems)
1-inch piece frozen ginger
1 Tablespoon flax seeds
1 scoop unflavored, unsweetened protein powder of choice
Toss all ingredients into Vitamix or other high-powered blender, gradually increase speed from low to high, and blend on high for about one minute, tamping down anything into the blades that isn't getting pulled down right away. Enjoy immediately!
As I write this, my arms a bit on the sore side, and my hands are shaking just the tiniest bit. You see, I just completed my customized workout designed for me and my specific body and all its issues by the western hemisphere's best personal trainer. (I was afraid if I said "best personal trainer in the known universe" that might sound hypey.)
Yes, just like many people this time of year, I'm working on getting healthy. I had some excellent excuses for getting to be completely in the worst shape of my life that go far beyond working too much while sitting on my previously-growing-by-the-day butt (I definitely do that), or my Mommy-baby weight (my youngest just turned 10 years old, so I guess I have to be done with that excuse). Two years ago I was diagnosed with -- and completely cured of! - lung cancer. But to get better I had open lung surgery (if you're into fancy medical terms it was a thoracotomy), and they removed a big chunk of my right lung. Because they had to cut through several layers of skin and muscle to do that, well, to this day, even after physical therapy my back still isn't fully recovered.
So two years ago this very month, after coming through that surgery, I decided I would get extra healthy and started doing the green smoothie thing.
That turned out to be a big mistake and ended up giving me kidney stones a few months later (I described why in this post), which sent me back to the hospital for two more surgeries. Seriously. That was a heckuva crappy year!
Now, more educated about healthy foods, I'm fully focused on getting into the best, most-rockin', HOT shape of my life. That is a tall order, considering in my 20s I wore size 4 clothing and worked out up to 6 days a week. But that was before I was married to the best trainer ever, and before I knew about GMOs, understood why organic food is crucial, and a whole host of other things.
So, here's today's post work-out smoothie recipe.
------------------------------------
Healthy Green Smoothie - Kale, Pineapple, Grape - Dairy-Free, Gluten-Free
3-4 Tablespoons filtered water
1 cup rough chopped pineapple
1 cup packed curly kale
1 cup frozen red grapes (no stems)
1-inch piece frozen ginger
1 Tablespoon flax seeds
1 scoop unflavored, unsweetened protein powder of choice
Toss all ingredients into Vitamix or other high-powered blender, gradually increase speed from low to high, and blend on high for about one minute, tamping down anything into the blades that isn't getting pulled down right away. Enjoy immediately!
Sunday, November 9, 2014
Rosemary Potato Bacon Frittata Recipe, Gluten-Free, Dairy-Free
This morning I had a quandary. My husband is a big man and a big eater. On Sundays I usually make a big brunch, which typically involves a LOT of eggs. Except this morning I only had five eggs left. Barely enough for my family of four good eaters. So it was time to get creative.
Last week the 10 pound bag of potatoes was about 10 cents more than the 5 pound bag, so I have a lot of potatoes and need something to do with them. Potatoes also are a good way to stretch a meal. Last night I was thinking I'd make some kind of scrambler, but then decided to try a frittata and I am so happy I did! It turned out deliciously. I hope you enjoy it as much as my family did. You'll notice I served mine with an extra piece of bacon and a gluten-free, dairy-free chocolate muffin.
------------------------------------------------------------------------------
INGREDIENTS:
1/2 pound uncured, nitrate-free bacon
3 large russet potatoes, peeled, cubed (you could use Yukon golds or red potatoes and not peel them for a more rustic dish)
3 tablespoons of olive oil, divided
2 springs fresh rosemary, chopped finely
1/2 large yellow onion (or 1 small)
2 cloves garlic, minced
1/2 teaspoon garlic powder
1/2 teaspoon paprika
5 eggs, beaten well
sea salt to taste
freshly ground black pepper to taste
DIRECTIONS:
Remove from oven and flip skillet onto large cutting board. The bottom of the eggs should be a deep golden brown color, while the top is slightly lighter. Cut into serving size portions and enjoy! I shake a few drops of Chulula on mine, while the kids like their ketchup. Enjoy!
Last week the 10 pound bag of potatoes was about 10 cents more than the 5 pound bag, so I have a lot of potatoes and need something to do with them. Potatoes also are a good way to stretch a meal. Last night I was thinking I'd make some kind of scrambler, but then decided to try a frittata and I am so happy I did! It turned out deliciously. I hope you enjoy it as much as my family did. You'll notice I served mine with an extra piece of bacon and a gluten-free, dairy-free chocolate muffin.
------------------------------------------------------------------------------
INGREDIENTS:
1/2 pound uncured, nitrate-free bacon
3 large russet potatoes, peeled, cubed (you could use Yukon golds or red potatoes and not peel them for a more rustic dish)
3 tablespoons of olive oil, divided
2 springs fresh rosemary, chopped finely
1/2 large yellow onion (or 1 small)
2 cloves garlic, minced
1/2 teaspoon garlic powder
1/2 teaspoon paprika
5 eggs, beaten well
sea salt to taste
freshly ground black pepper to taste
DIRECTIONS:
- Line large jelly roll pan or other cookie sheet/pan with edges to catch the bacon fat with aluminum foil and place bacon evenly across the pan, being careful not to overlap any pieces. Place pan into a COLD oven and turn oven to 400 degrees. Set the timer for 18 minutes. When the bacon comes out of the oven, leave it on. Remove bacon and let drain on paper towels. Chop cooked bacon into large pieces.
- Meanwhile, cover the potatoes with water in a small saucepan and bring to a boil. Boil the potatoes for 5-7 minutes or until a fork can easily go through but not so they are smooshy and break apart. They should still be slightly firm. Drain potatoes.
- Add 2 tablespoons olive oil and rosemary to a cast-iron skillet over medium heat. Allow the rosemary to infuse the oil as you chop the onion and mince the garlic. Then add onion and garlic and cook for about one minute, being careful not to burn the garlic. Mix the cooked potatoes with the onions, garlic and rosemary in the skillet and lightly smash the potatoes with a potato masher so a few big chunks still remain. Season with salt, pepper, garlic powder, and paprika and leave alone to let brown lightly on the bottom for about 5-7 minutes.
- After the bottom of the potatoes are lightly browned, turn them over to cook the other side of the potatoes. (I ended up stirring mine around the skillet because they weren't yet all one cohesive piece. That's okay, it's what you want.) Drizzle with remaining olive oil. Cook opposite side of potatoes for about 3-4 minutes. Top with chopped bacon pieces and eggs, making sure to allow the eggs to get inside and under all the potatoes. Cook bottom of eggs about one minute until beginning to get firm but still very wet on top and place skillet into preheated oven. Bake for 8-10 minutes or until top is light golden brown.
| Underside of frittata after being turned out of skillet |
Saturday, November 8, 2014
Shrimp Bisque: Gluten-free, Dairy-Free, All Delish
| This was my second bowl. Yum. |
Tonight I *thought* had some leftover "imitation" lobster meat. Yes it's processed. But it's not bad, is it? (Tell me in the comments if it is.) So I thought I'd make lobster bisque. When I looked at my recipe it had butter. So I had to adjust that out for my new dairy-free-ness. Then as I was cooking and pulled out my "lobster" close to the time I needed to add it, I realized it had gone bad in the fridge and suddenly I was stuck (and grossed out, plus a little ticked that the label had said it was good until the end of November, and now that I'm thinking about it, how could real seafood be good for a month? I'm sure the processed stuff is bad now...).
But no fear! My freezer to the rescue! I had some lovely raw, deveined, easy-peel shrimp. (Just shrimp on the ingredient label - yay!) I usually have frozen homemade shrimp broth, which I would have totally used for this, but I was out, so I ended up using my homemade chicken broth mixed with Thai fish sauce, which worked FABULOUSLY! So, I made this up on the fly and it turned out so deliciously that I had to record it here - or else risk never getting it right again, You know what I mean? Yes you do. We all do that. Make the most amazing food, knowing for sure we'll remember what it was because how could you not, and then never ever be able to duplicate it again. Sigh. Well not THIS time!
Even if no one else ever makes this, while that would be a shame because it turned out AMAZING, I am writing this recipe for me to remember so I can make it again and have my family ooh and ahh over how lucky they are to have an awesome Mommy and wife like me, and how no restaurant could ever come close. Yeah. They rock.
Now - get to cooking.
----------------------------------------------------------------
SHRIMP BISQUE - Gluten Free, Dairy Free
6 tablespoons olive oil (can substitute coconut oil, or combine 3 T olive oil and 3 T ghee)
1/4 cup yellow onion
6 garlic cloves, minced
6 tablespoons white rice flour
1/2 c white wine (I used chardonnay)
1 tablespoon Worcestershire sauce
2 tablespoons fish sauce (the kind from the Asian section in the grocery or your fridge!)
1 teaspoon hot pepper sauce (I use Chalula and should probably have them as a sponsor)
2 teaspoons paprika
2 teaspoons Old Bay seasoning (YES it IS gluten free!!)
3 bay leaves
2 teaspoons sea salt (or to taste - your fish sauce will make a difference)
2 1/2 cups homemade chicken broth (seriously do not use that stuff in the cans and if you do, you may not need any salt)
1 8-ounce can tomato sauce
1 pound raw shrimp, rough chopped
1 can full fat coconut milk (the kind from the Thai aisle, not the cold one in the carton, there's nowhere near enough fat to get the unctuous mouth feel you want from a good bisque)
1/2 cup dry sherry
Directions:
1 In a dutch oven heat oil over med-high heat and saute onions until translucent, about 3-5 minutes. Add garlic and saute another few seconds. Sprinkle all with flour and mix into a roux.
2 Deglaze the pan with the white
wine. (That means add the wine and scrape up the bottom of the pot really well.) It will quickly form a globby mess. That's okay.
3 Whisk in the Worcestershire, hot sauce, and fish sauce
and then add the broth. Bring to a boil.
4. Stir in tomato sauce, paprika, Old Bay, and add the bay leaves. Turn heat down to low, cover and simmer for 10 minutes.
5. Raise heat back to medium high and stir in the raw shrimp. Heat until
cooked through, about 2-3 minutes. Do not overcook the shrimp.
6. Whisk in coconut milk and heat through. Adjust seasoning to taste. If you like a little more spice, add some more hot sauce. Stir in sherry just before serving. (Or, if you have children, after adding sherry, bring back to a boil to evaporate the alcohol so you don't end up with tipsy kids or in jail. Because either would be very, very bad.) Remove bay leaves before serving because no one wants to get stuck with one of those things floating around in their bowl.
Serve in your fancy-schmaniest bowls and be ready to lick those suckers at the end because this is SO GOOOOOOD!
If you like to garnish, use some chopped green onions, or, if you're fresh out like I was, sprinkle a little more paprika and Old Bay on the top and call it done!
Monday, October 20, 2014
Shrimp and Grits (Gluten Free, Dairy Free)
| Gluten-free, dairy-free shrimp and grits. |
Shrimp happened to be on sale last week so I picked up a pound and thought I'd make one of my regular shrimp go-tos like scampi. But today, as I was thinking about what to make, the idea of shrimp and grits popped into my head and sounded FABULOUS.
In case you didn't know, grits is a dish made from cornmeal. It's known in Italian cooking as polenta (yet still my Mom isn't a fan, although she grew up in her mother and father's Italian kitchen). And in other circles it's called by it's least appetizing name, "mush."
Shrimp and grits became popular in the south near fishing communities, especially near Charleston, South Carolina, where the shrimp were plenty and the grits were cheap, particularly during shrimping season, May through December. Traditionally there is bacon fat involved, and while there's nothing wrong with that at all, sometimes you want something lighter (not that creamy grits could be considered light, but you know what I mean!). There are as many recipes for shrimp and grits as there are variations of minestrone soup in Italian-cooking land. With the emergence of special dietary needs, there are an ever-growing number of shrimp and grits recipes. My recipe is my own creation today.
If you're already a grits fan, you may prefer your grits a bit more on the runny side, but I like mine thicker. Feel free to add more liquid to your version and make it your own!
Also, these all happen to be ingredients that I almost always have on hand, including homemade shrimp stock/broth. To make a basic shrimp stock, peel raw shrimp and toss the legs and shells into a stock pot with whatever veggie scraps you have in your freezer. I save all my carrot peels and ends, onion and garlic skins and ends, celery leaves, potato skins, and so on in a gallon-sized freezer bag adding to it every night in the freezer and once every couple of weeks use them with whatever protein I have to make a stock. In this case it's shrimp shells and legs. Cover with water to the top of the pot and boil for about 45-60 minutes. I choose not to add salt so that I can salt any subsequent dish as I cook it, instead of the broth itself. Strain the liquid, cool, and freeze in various small containers.
In a pinch you can use gluten-free shrimp or fish stock in a can, but obviously homemade is best, and when made with the veggie scraps, costs nothing because you would have thrown those scraps in the garbage, anyway!
Now, on with the recipe.
--------------------------------------------------
Shrimp and Grits
4 1/2 - 5 Cups homemade or gluten-free canned shrimp stock
1 1/4 cup gluten-free cornmeal
3/4 coconut milk (full fat, in the can - this is what will give your dairy-free grits the creamy, rich consistency that this dish is known for)
1 lb. shrimp, raw, peeled, deveined, tail on (I use 16/20 size, but you can use whatever medium size you prefer)
3 tablespoons coconut oil
1 small onion, chopped
1 small red (or green) jalepeno pepper, seeded and chopped
juice of one-half a small lemon (do NOT use that nasty stuff in the yellow plastic fake thing; yuck)
2 tablespoons fresh, flat leaf parsley, chopped
3 teaspoons Old Bay seasoning (Yes! It's gluten free!)
2 teaspoons granulated garlic, or two cloves chopped fresh garlic
salt and freshly ground pepper to taste
1-2 tablespoons tapioca starch or flour
Method -
For Grits:
Mix cornmeal with 1 1/4 cup cold shrimp stock in a bowl. Bring 2 cups shrimp stock to a boil and add cornmeal mixture, plus 1 teaspoon salt, several cracks of freshly ground pepper, and 1/2 teaspoon Old Bay seasoning. Stir vigorously with a wooden spoon over medium heat for 5-7 minutes until thick. If you prefer your grits looser, add more stock. Add coconut milk, incorporating well. Remove from heat. Taste and add more seasonings (salt, pepper, Old Bay) to taste.
For Shrimp:
Heat coconut oil in large skillet over medium-high heat. Add onions and jalapeno pepper and saute for 2-3 minutes until onion is translucent and just starting to brown around the edges. Add shrimp, 1 teaspoon salt, 2 teaspoons Old Bay, garlic, and freshly ground black pepper. Saute 3-5 minutes depending on the size of your shrimp, until cooked. Mix in lemon juice and and parsley. While the shrimp cooks, mix remaining cold shrimp stock (about 1 C) with 1 tablespoon tapioca starch to form a slurry. When shrimp is cooked, add the slurry and stir constantly until boiling. If the sauce isn't as thick as you like it, quickly combine remaining 1 tablespoon tapioca starch with a few tablespoons of cold water and mix into the sauce until it thickens. Season to taste with more salt, pepper and Old Bay. Serve in bowls over grits with plenty of sauce.
Enjoy!
Monday, June 9, 2014
Baked Cod with Roasted Orange Pepper Sauce over Arugula with Lemon Vinaigrette
Baked Cod with Roasted Orange Pepper Sauce over Arugula
with Lemon Vinaigrette
We
were so excited to try this dinner tonight, I totally skipped taking
photos. So I'm including a photo of an arugula salad in case you're not
familiar with this peppery green which has been popular in Italy and has
been gaining traction here in the US since about the millennium. If
you're from the UK you'll know it as "rocket," which is a much better
description of the flavor in my mind.
This
time of year, where I live in northern Illinois, arugula is plentiful
and inexpensive at the farmers' markets and I'm always looking for
recipes where I can let its flavor shine. This dish is one of those. If
you don't have arugula, you can use a mixed field green salad with the
same dressing.
For
most recipes I create, I more go by taste than measurements, so I'm
guessing on the amounts of the seasonings. Feel free to use more or
less to your taste and preference.
For the Fish:
2 lbs. cod or other firm white fish
2-3 T olive oil
1 tsp garlic powder
1 tsp sea salt
Fresh ground pepper to taste
1 tsp ground coriander
1 tsp dried basil
Drizzle fish with olive oil and season with
remaining ingredients. Bake in preheated 400°F oven on foil-lined pan or
glass dish for 20-35 minutes or until
fish flesh is opaque and easily flakes with a fork.While fish is baking,
make the sauce and dressing.
Roasted Yellow Pepper Sauce
1 yellow, red, or orange bell pepper (I had yellow, so that's why the color was yellow. The flavor is essentially the same.)
1 small yellow onion, diced
2 cloves garlic, smashed and peeled
Juice of ½ fresh lime (do NOT substitute anything from a
plastic fake fruit!! You can substitute fresh lemon juice or omit if you don’t
have the fruit).
1 tsp ground coriander
4 T olive oil, divided
Sea salt, to taste
Freshly ground pepper, to taste
Rinse and dry the pepper. Then roast the pepper over an
open flame on your gas stove top, turning as each side becomes charred. If you
have an electric range, place the pepper under a broiler and keep a close
eye on it, turning it as each side becomes charred. After charring, set aside
for a few minutes until cool enough to peel. I peel mine by rinsing under cold
water and pulling off the stem and removing the seeds and ribs with my fingers.
Tear into large chunks and put into Vitamix or other high speed blender..
Meanwhile, sauté the onion and garlic on med-low
heat in
about 2-3 tablespoons olive oil seasoned with about ½ tsp salt until
translucent and just starting to brown around the edges, about 5-7
minutes. Sprinkle
with ground coriander. Pour mixture into the Vitamix. Blend on medium to
high for about 30 seconds. Adjust salt and pepper seasoning, add
remaining olive oil and blend again for a few more seconds until the
mixture is smooth and homogenous.
Whip up the lemon vinaigrette:
1 tsp lemon zest
¼ c olive oil
¼ c fresh-squeezed lemon juice
¼ tsp of xylitol, stevia, monk fruit, or other natural
sweetener
2 garlic cloves, minced
2 tsp fresh oregano, finely chopped (or ½ tsp dried)
Sea Salt and Freshly ground pepper to taste
Place all ingredients into a glass jar (Ball or Mason style or recycled jelly jar), close lid tightly and
shake it like you mean it. Toss with four large handfuls of arugula.
To plate:
Place
a bed of the lightly dressed arugula on the plate, then top with a
serving of fish. Finish the play by drizzling about 1/8 cup of the sauce
(I have a small-sized ladle which is perfect). It tastes as delicious
as it looks and next time I fix this (possibly next week) I'll update
with photos. :-)
Wednesday, April 30, 2014
Pineapple Blueberry Ginger Green-ish Smoothie
Ever since I picked up my Vitamix, barely a day goes by without another experiment in deliciousness. I may have enjoyed the exact same smoothie twice, but if I did, it was never in a row and almost never on purpose. There are simply too many combinations to try and fall in love with!
However, many of my smoothies have some things in common. I prefer fruit-based smoothies (unless I'm feeling like chocolate!), and there are a few things I use very often.
Two of the standard ingredients I almost always use include:
Unsweetened Plain Almond Milk - I've tried fruit juices, coconut water, coconut milk, and even plain filtered tap water as the liquid base for my morning breakfast smoothies, but I always return to good old almond milk. It blends up well and doesn't add any distinctive flavor. Plus it's low carb for when I'm doing that kind of diet, has only 30 calories per serving (only water beats that!), contains some great vitamins and minerals (sorry, H2O!), and even has a gram of protein. Sometimes I add the vanilla flavored almond milk, but it's always the unsweetened variety. If I'm going to add a sweetener, I want to be in control of exactly what it is I add and how much.
Flax Seeds - These little gems keep things moving along on the inside and are so easy to incorporate into your diet, including in smoothies - plus they're super inexpensive, unlike some health foods. Some studies show that flax seeds can help reduce the risk of heart disease, cancer and stroke, but I like them for the high fiber content and plant-based Omega-3 fatty acids. Like unsweetened and unflavored almond milk, they add no flavor, but they do make the texture a little thicker, which adds to the rich creamy goodness. I buy them in a big package and then store in a freezer bag in my freezer so they stay fresh. A bonus is I feel better when I have them in my diet. I've also used chia seeds and hemp seeds and like those as well, but flax seeds are my almost daily go-to ingredient.
With my Vitamix, these tiny bits of "super food" get ripped up and fully incorporated so the end result in the smoothie is as smooth as can be. I've not tried blending flax seeds with any other blender, but if you end up with a gritty result or even whole seeds, get a better blender if you're going to be eating smoothies regularly.
A note about green smoothies: They may not be as good for you as you think if you're making the same mistake I was. Last year I began using a large handful of fresh spinach leaves every single day in my smoothies, which after a few months led to painful kidney stones (and two surgeries!) due to a compound called oxalate in the spinach. These days I use spinach in smoothies sparingly and only very occasionally, preferring now to add a tablespoon or two of a natural mint-flavored liquid chlorophyll, available online and at health food stores. It's a punch of the green goodness that doesn't add unnecessary compounds that can lead to disastrous results.
So for this morning's "green-ish" smoothie - I call it that because I used the liquid chlorophyll today, but with the addition of blueberries it was a definite purple rather than green - here's what I added to my Vitamix:
1 cup unsweetened plain flavored almond milk
1/4 of a fresh pineapple (peeled, with core in tact), chopped in big chunks
1/2 C frozen blueberries
2 Tablespoons flax seeds
1 Tablespoon mint-flavored liquid chlorophyll
1" piece of fresh ginger
Toss all into your high-powered blender starting with the milk and blend on high for 1-2 minutes so all the ingredients are fully liquified, smooth and delicious. Makes enough for one large serving or to share two smaller servings. Enjoy immediately!
However, many of my smoothies have some things in common. I prefer fruit-based smoothies (unless I'm feeling like chocolate!), and there are a few things I use very often.
Two of the standard ingredients I almost always use include:
Unsweetened Plain Almond Milk - I've tried fruit juices, coconut water, coconut milk, and even plain filtered tap water as the liquid base for my morning breakfast smoothies, but I always return to good old almond milk. It blends up well and doesn't add any distinctive flavor. Plus it's low carb for when I'm doing that kind of diet, has only 30 calories per serving (only water beats that!), contains some great vitamins and minerals (sorry, H2O!), and even has a gram of protein. Sometimes I add the vanilla flavored almond milk, but it's always the unsweetened variety. If I'm going to add a sweetener, I want to be in control of exactly what it is I add and how much.
Flax Seeds - These little gems keep things moving along on the inside and are so easy to incorporate into your diet, including in smoothies - plus they're super inexpensive, unlike some health foods. Some studies show that flax seeds can help reduce the risk of heart disease, cancer and stroke, but I like them for the high fiber content and plant-based Omega-3 fatty acids. Like unsweetened and unflavored almond milk, they add no flavor, but they do make the texture a little thicker, which adds to the rich creamy goodness. I buy them in a big package and then store in a freezer bag in my freezer so they stay fresh. A bonus is I feel better when I have them in my diet. I've also used chia seeds and hemp seeds and like those as well, but flax seeds are my almost daily go-to ingredient.
With my Vitamix, these tiny bits of "super food" get ripped up and fully incorporated so the end result in the smoothie is as smooth as can be. I've not tried blending flax seeds with any other blender, but if you end up with a gritty result or even whole seeds, get a better blender if you're going to be eating smoothies regularly.
A note about green smoothies: They may not be as good for you as you think if you're making the same mistake I was. Last year I began using a large handful of fresh spinach leaves every single day in my smoothies, which after a few months led to painful kidney stones (and two surgeries!) due to a compound called oxalate in the spinach. These days I use spinach in smoothies sparingly and only very occasionally, preferring now to add a tablespoon or two of a natural mint-flavored liquid chlorophyll, available online and at health food stores. It's a punch of the green goodness that doesn't add unnecessary compounds that can lead to disastrous results.
So for this morning's "green-ish" smoothie - I call it that because I used the liquid chlorophyll today, but with the addition of blueberries it was a definite purple rather than green - here's what I added to my Vitamix:
1 cup unsweetened plain flavored almond milk
1/4 of a fresh pineapple (peeled, with core in tact), chopped in big chunks
1/2 C frozen blueberries
2 Tablespoons flax seeds
1 Tablespoon mint-flavored liquid chlorophyll
1" piece of fresh ginger
Toss all into your high-powered blender starting with the milk and blend on high for 1-2 minutes so all the ingredients are fully liquified, smooth and delicious. Makes enough for one large serving or to share two smaller servings. Enjoy immediately!
Subscribe to:
Posts (Atom)